Iphoto And Picasa For Mac
We have increased our staff to better service you and to answer your calls, emails and social media messages as quickly as possible.Thank you for your patience as we catch up.We appreciate your help in fighting this outbreak by sewing masks, gowns, and projects you'll remember for a lifetime. From our SINGER family to yours, #sewunited. Singer 5825c manual.
You really need to choose between iPhoto and Picasa. The two apps do the same job (but have somewhat different features.) What you are trying to do is similar to writing your novel in Word and Pages at the same time.The only way to make photos available from iPhoto to Picasa is to export them from iPhoto (File -> Export).
The Finder is for organising Files. iPhoto is for organising Photos. iPhoto does not organise pics by the date modified of the file, it does so by the date the photo was taken as recorded in the Exif metadata.
The entire
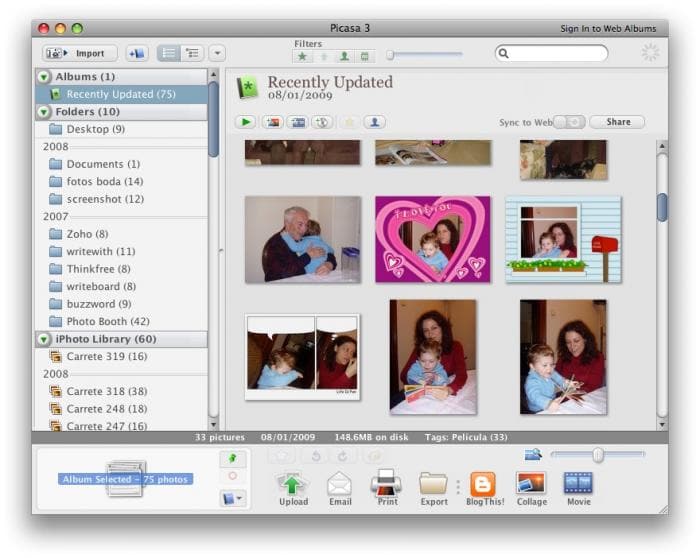
Should I ignore iPhoto and go with Picasa for Mac? Also, I naively thought that Aperture was a large photo-library management application. I had intended to make the switch and have Aperture installed and use that in place of Picasa and iPhoto. But many of the comments seem to infer that Picasa or iPhoto is still needed for library management. Picasa is a program developed by Google, Inc. Whose function is to allow the user view and organize the pictures in his/her Mac. Picasa searches for all the images in your HD and shows them on an eye-catching and intuitive interface. Without any doubt, the presentation is one of the high points of this applications.
point of iPhoto is to let the app manage the files so you can work with your Photos.iPhoto stores the edited files inside the library package. To access them: File -> Export, Kind: Current.
Among the differences between iPhoto and Picasa are:
iPhoto is colour managed, Picasa isn't.
iPhoto has the full range of keepsakes - books, cards calendars. Picasa has none.
iPhoto facilitates easy uploading to more sites than Picasa.
iPhoto is tightly linked into the Operating System - see below.
Finally, you need to read the licence n Picasa carefully. By accepting it you give Google the right to update your software without consulting you. Fine if you trust Google. I know I wouldn't trust anybody to update my software without my knowledge and specific consent in each case.
There are many, many ways to access your files in iPhoto:
*For Users of 10.5 and later*
You can use any Open / Attach / Browse dialogue. On the left there's a Media heading, your pics can be accessed there. Command-Click for selecting multiple pics.
(Note the above illustration is not a Finder Window. It's the dialogue you get when you go File -> Open)
You can access the Library from the New Message Window in Mail:
Uploaded with plasq's Skitch!
*For users of 10.4 and later* ..
Many internet sites such as Flickr and SmugMug have plug-ins for accessing the iPhoto Library. If the site you want to use doesn’t then some, one or any of these will also work:
To upload to a site that does not have an iPhoto Export Plug-in the recommended way is to Select the Pic in the iPhoto Window and go File -> Export and export the pic to the desktop, then upload from there. After the upload you can trash the pic on the desktop. It's only a copy and your original is safe in iPhoto.
This is also true for emailing with Web-based services. However, if you're using Gmail you can use iPhoto2GMail
If you use Apple's Mail, Entourage, AOL or Eudora you can email from within iPhoto.
If you use a Cocoa-based Browser such as Safari, you can drag the pics from the iPhoto Window to the Attach window in the browser.
*If you want to access the files with iPhoto not running*:
For users of 10.6 and later:
You can download a free Services component from MacOSXAutomation which will give you access to the iPhoto Library from your Services Menu. Using the Services Preference Pane you can even create a keyboard shortcut for it.
For Users of 10.4 and later:
Create a Media Browser using Automator (takes about 10 seconds) or use this free utility Karelia iMedia Browser
Other options include:
1. *Drag and Drop*: Drag a photo from the iPhoto Window to the desktop, there iPhoto will make a full-sized copy of the pic.
2. *File -> Export*: Select the files in the iPhoto Window and go File -> Export. The dialogue will give you various options, including altering the format, naming the files and changing the size. Again, producing a copy.
3. *Show File*: Right- (or Control-) Click on a pic and in the resulting dialogue choose 'Show File'. A Finder window will pop open with the file already selected.
Regards
TD
Nov 4, 2009 1:51 PM
Prepare your drive
You can store your library on an external storage device, such as a USB or Thunderbolt drive formatted as APFS or Mac OS Extended (Journaled).1 Find out how to check the format of your external storage device.
To prevent data loss, Apple doesn't recommend storing photo libraries on external storage devices like SD cards and USB flash drives, or drives that are shared on a network.
Move your Photos library to an external storage device
- Quit Photos.
- In the Finder, go to the external drive where you want to store your library.
- In another Finder window, find your library. The default location is Users > [username] > Pictures, and it's named Photos Library.
- Drag your library to its new location on the external drive. If you see an error, select your external drive's icon in the Finder, then choose File > Get Info. If the information under Sharing & Permissions isn't visible, click , then make sure the 'Ignore ownership on this volume' checkbox is selected. If it's not selected, click to unlock it, enter an administrator name and password, then select the checkbox.2
- After the move is finished, double-click Photos Library in its new location to open it.
- If you use iCloud Photo Library, designate this library as the System Photo Library.
Delete original library to save space
After you open your library from its new location and make sure that it works as expected, you can delete the library from its original location.
In a Finder window, go back to your Pictures folder (or whichever folder you copied your library from) and move Photos Library to the trash. Then choose Finder > Empty Trash to delete the library and reclaim disk space.
Open another Photos library
If you have multiple libraries, here's how to open a different one:
- Quit Photos.
- Press and hold the Option key while you open Photos.
- Select the library that you want to open, then click Choose Library.
Photos uses this library until you open a different one.
Learn more
If you have a permissions issue with your library, you might be able to resolve the issue by using the Photos library repair tool.
1. You can't move your library to a disk that's used for Time Machine backups.
2. If the volume isn't formatted APFS or Mac OS Extended (Journaled), or has been used for Time Machine backups but hasn't been erased, this checkbox will either not be present, or won't be selectable after unlocking. Erase and reformat the drive for this option to be available.Final fantasy dawn of souls rom.